One of the questions I get a lot,
especially from Fly Baby fans in northern climes, is how to build a
canopy for a Fly Baby.
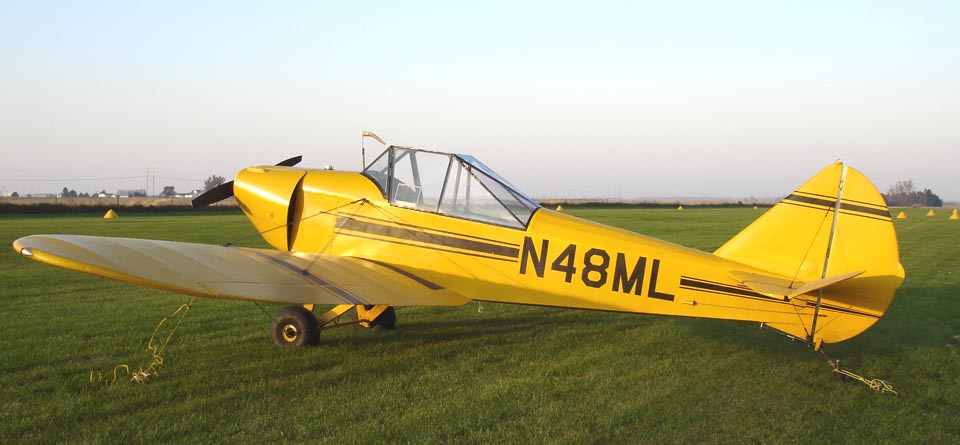
Matt Michael bought N48ML a while
back, and has built a nice-looking canopy to go with it. The neat
thing about Matt's design is that it was added to a flying Fly Baby...
the plane doesn't have to be originally built with the canopy.
This is exactly why
Pete designed the airplane with a removable turtledeck...so a builder
can have a canopy for winter flying, and enjoy an open cockpit feel and
look in the summer.
Matt supplied the pictures and much of the description, and I've added
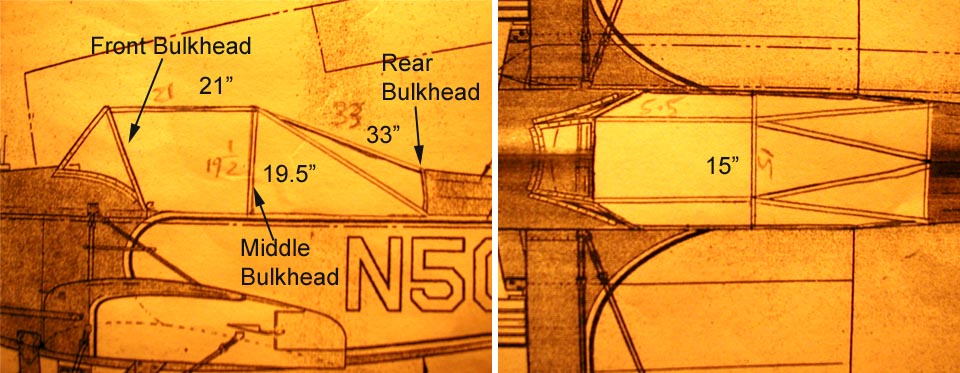
a bit of amplifying information. There are only rough dimensions
given, as every Fly Baby will be a bit different, especially in the
windshield shape. You'll need to build your canopy to match your
windshield.
Matt's design is a "throw-over" type, like an RV-4 or ME-109, not a
sliding canopy. This avoids a whole lot of structural
problems...as well as the danger of a slider coming off its tracks and
removing part of your tail as it departs the airplane.
RJW This design works with the stock windshield and turtle deck.
What's special is that it eliminates any compound curves. It was a lot
of fussy work but cheap and simple to build.
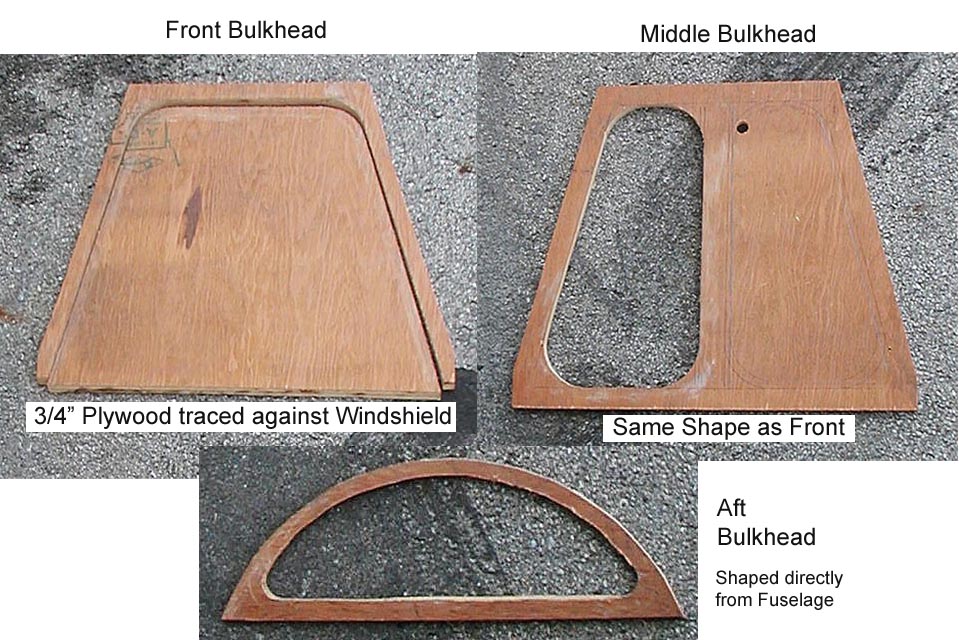
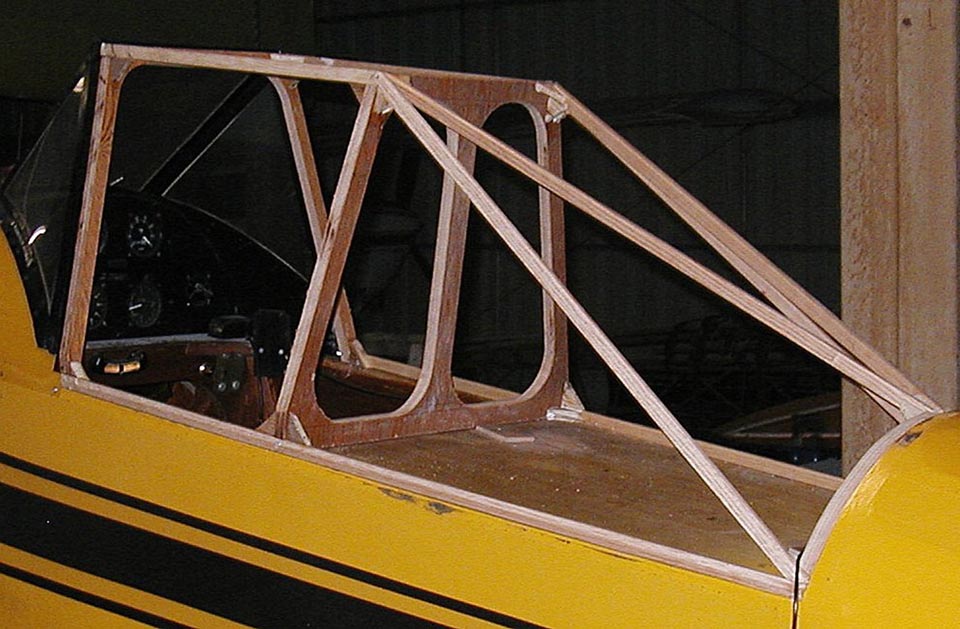
The
basic structure is 3/4" plywood, held together with small screws and
glue. The Front
Bulkhead matches the windshield shape...Matt just took a tracing on the
plywood. The middle bulkhead is the same basic shape, but cut out
for a pair of ovals instead of a complete cutout like the front.
This really helps the structural integrity.
The table saw was handy for cutting stringers and corner blocks. Lots
of angles there but easily tamed with an adjustable angle gauge. No
figuring just lots of back and forth. Wood is cheap so if a part didn't
fit I just cut another. Lexan is a dream to work with but scratches if
you look at it wrong. Again, mess it up--just cut another one, easy.
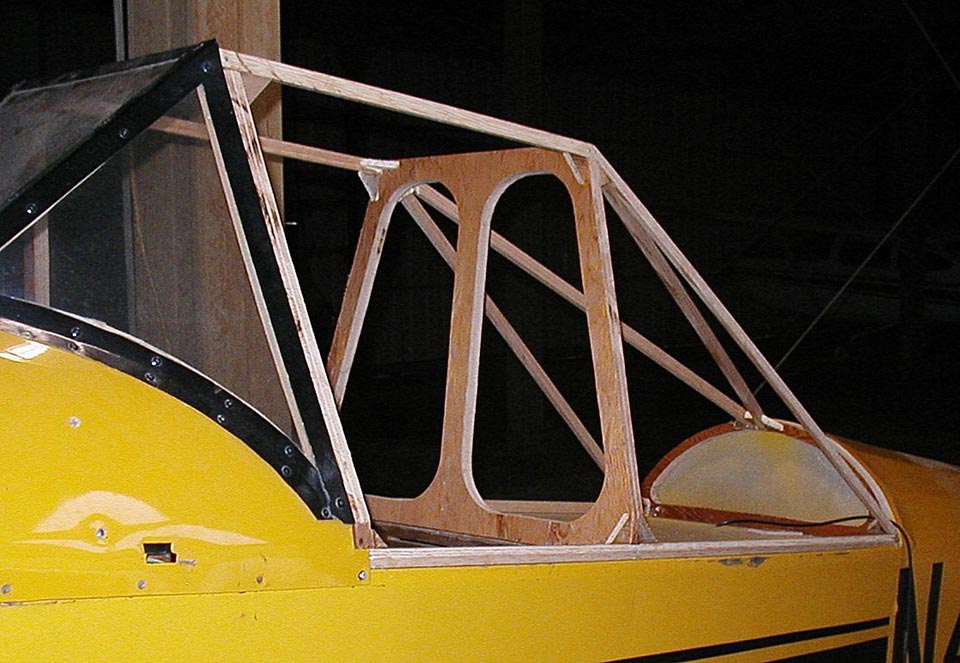
The above picture, and the one below,
show a lot of detail on how Matt designed the canopy. The
Stringers are made from spruce or fir, as are the corner
blocks at each intersection. Again, this is held together
by small screws and glue. Matt's corner blocks look like they're
1/2"..I think I'd use the same 3/4", just to give a bit more
"meat" for the screws to dig into. But I have a tendency to
overdesign, anyway....
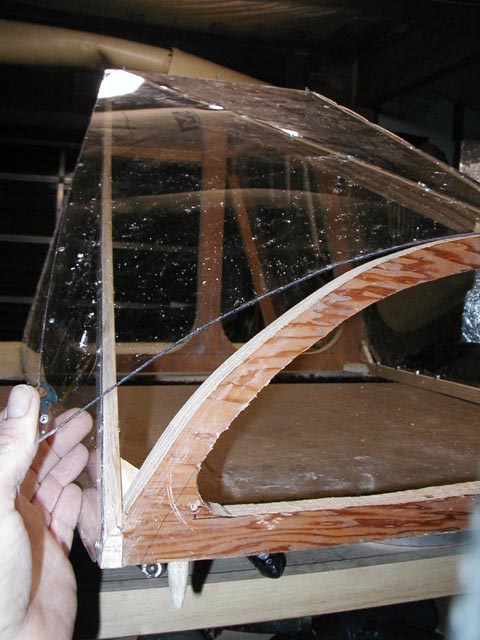
These pictures are basically "fit
checks" before Matt takes the time to finish-sand and paint the frame.
Matt's canopy uses
Lexan for the clear sections. The aft panels are the only ones
that have to curve, he made these out of 1/16" Lexan. The forward
section should be 1/8" minimum.
Matt doesn't show the details of his locking system, but it appears he
has a cable-operated pin that goes into the same positioning hole in
the aft bulkhead as the original turtledeck. A suitcase latch
like the standard canopy would be just fine, up front. The canopy
uses piano hinge on the right longeron.
I didn't include the pictures of it, but Matt also added a small access
windown on the left side. This lets him reach in and work the
lock mechanism from the outside, and will let him get a little fresh
air when he wants it.
Still working on best way to seal around the edges. Back and sides are
easy with foam and/or overlapping exterior strips but the front is
complex due to the way the side hinging mates the canopy to the
windshield. So far it just hasn't been an issue as the close fit (about
1/8th inch gap) doesn't draft noticeably.
This canopy now has about 70 hours of use on it and has only shown a
few tiny stress cracks, which were expected and are easily stop
drilled. It weighs only a pound or two more than the turtle deck.
It really makes cross-country flying super nice. While the view through
the lexan isn't as nice as nothing, the field of view is actually
larger as the turtle deck isn't in the way. It takes a screw gun and
about 5 minutes to swap from open cockpit to canopy.
 Matt's canopy uses
Lexan for the clear sections. The aft panels are the only ones
that have to curve, he made these out of 1/16" Lexan. The forward
section should be 1/8" minimum.
Matt's canopy uses
Lexan for the clear sections. The aft panels are the only ones
that have to curve, he made these out of 1/16" Lexan. The forward
section should be 1/8" minimum.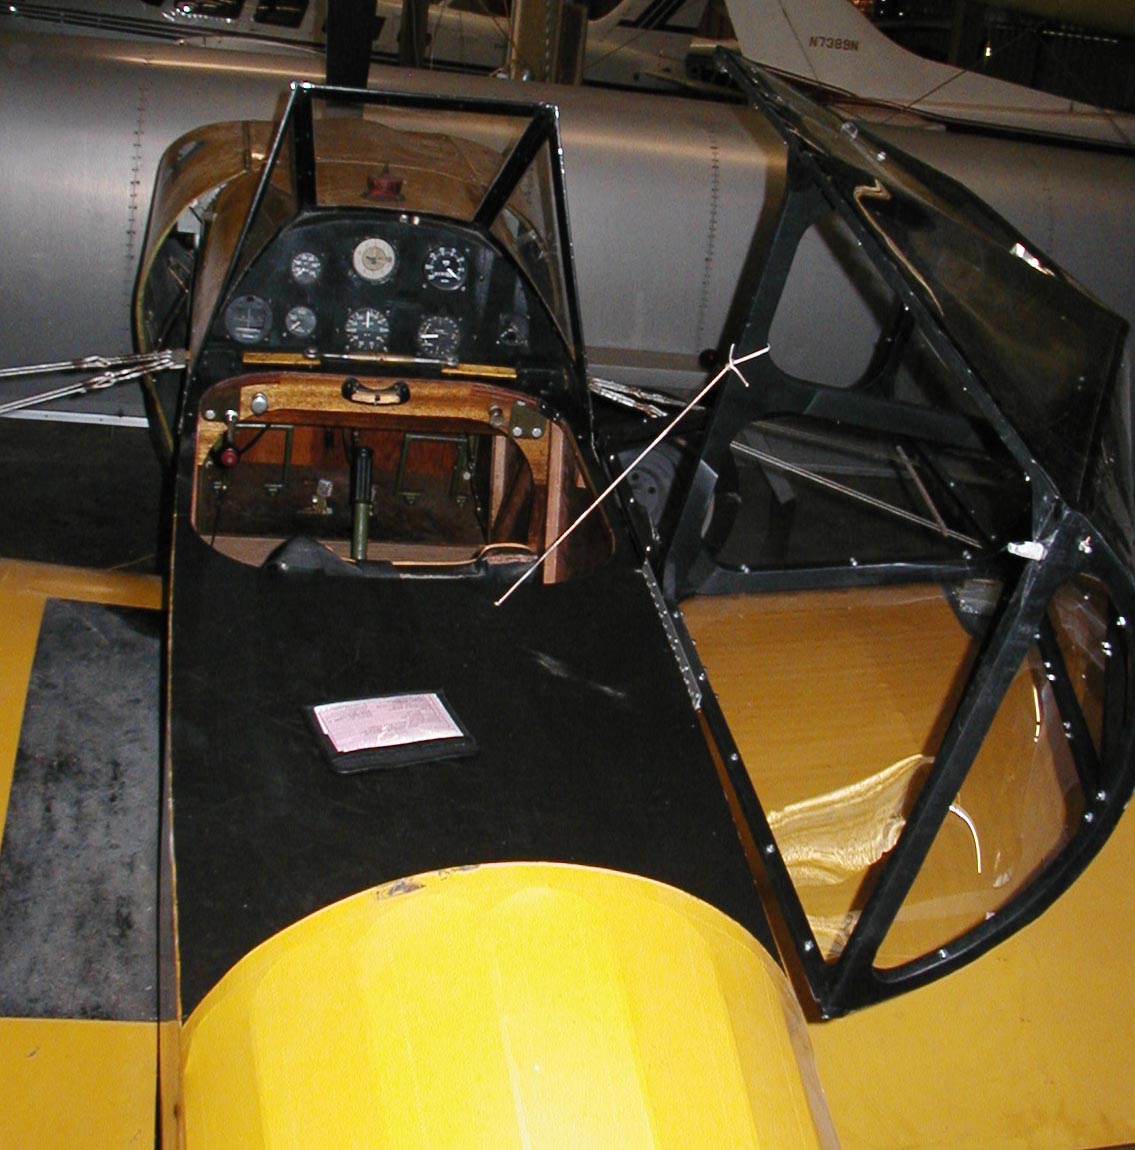
 Return to the Tech
Page
Return to the Tech
Page