 I ran into
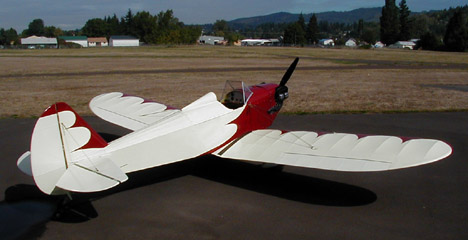
Mike Proshold and his Fly Baby for the first time at the Kelso EAA Fly-In
in June, 2003. His brand-new airplane positively sparkled in the
sun. But I thought I noticed one problem with it.
I ran into
Mike Proshold and his Fly Baby for the first time at the Kelso EAA Fly-In
in June, 2003. His brand-new airplane positively sparkled in the
sun. But I thought I noticed one problem with it.
I ran into
Mike Proshold and his Fly Baby for the first time at the Kelso EAA Fly-In
in June, 2003. His brand-new airplane positively sparkled in the
sun. But I thought I noticed one problem with it.
The simple bent-strap hinges Fly Babies use on their tail surfaces leaves a gap about an inch wide between the stabilizer and the rudder or elevator. This is poor aerodynamics, so Pete calls for using fabric to seal these areas. See Page 7-10 of your plans.
The fabric joins the surfaces, and, when painted, makes the vertical stabilizer/rudder and horizontal stabilizer/elevator look like they're just one piece.
But as soon as I spotted Mike's airplane, I could tell he didn't have the fabric seals. "Hey, Mike...you should really have gap seals on your tail surfaces."
"I've already got them," was the reply.
I looked close, and son-of-a-gun. He did.
 Mike had used
clear plastic angles for a simple, cheap, gap seal. These angles
are sold at your typical home-improvement store; they intended to protect
the wallpaper at corners.
Mike had used
clear plastic angles for a simple, cheap, gap seal. These angles
are sold at your typical home-improvement store; they intended to protect
the wallpaper at corners.
I really got a kick out of Mike's low-cost and easy-to-build solution to the gap seal problem. But, several months later when I had to do some serious work on my tail post, Mike's gap seal was a lifesaver. I have the fabric "X-type" gap seals on my plane, and I had to cut them off to remove the rudder. My Fly Baby is painted with Imron-style paint, which is almost impossible to make patches on and still have it look decent.
So... I decided to use the Proshold gap seal on my rudder. Here's how it works:
When I cut off the old "'X-seal," I cut them right at the hinge line to leave two "flaps" on each side of both the stabilizer spar and rudder spar.
I made gluing strips from plywood and wrapped them with waxed paper. I applied Poly-Tac to the inside of each flap, folded them back against the spars, and nailed down the gluing strips.
The nice thing about this approach is that it kept the paint scheme going...the beige, green, and the red trim strip bent nicely on the back side of the stabilizer spar and nearly matched up. It looked darn good.
However, it did leave the ends of the cut strips exposed. I figured that might be a problem on the rudder spar...the open edges were facing forward, exposed to the slipstream. I was a bit worried that the tug of the air would try to rip the glued seams open and tear the fabric right off the rudder.
So I applied a strip of reinforcing tape right down the seam on the centerline of the rudder. I took the full Stits process right to the silver dope, then masked off and painted with my beige Rustoleum and some green enamel that was the closest I could find to the green Aerothane trim I have.
I figured the vertical stabilizer spar would be fine without the reinforcing tape. Even it an edge came loose, the slipstream would be pushing it back in place. And in any case, the plastic angle would install atop it, helping hold it down.
 Making the Proshold
seals themselves was a snap. Pick up the plastic angle at the local
home improvement store. There are usually two sizes, one 3/4" and
the other 1". Get the 1" stuff.
Making the Proshold
seals themselves was a snap. Pick up the plastic angle at the local
home improvement store. There are usually two sizes, one 3/4" and
the other 1". Get the 1" stuff.
Measure the distance each seal segment has to cover. Leave a half-inch or so clear around both ends of any hinges, to give clearance for the pin when it's installed.
Cut off the right length of angle then trim one leg to the width of the hinges...about 3/4". Too long, and it'll drag on the control surface as it moves...you don't want that. Since you're running the angle right down the centerline of the hinges, the worst-case clearance will be when the control is centered.
You can either leave the angles clear like Mike, or paint them to match the rest of the plane, like I did.
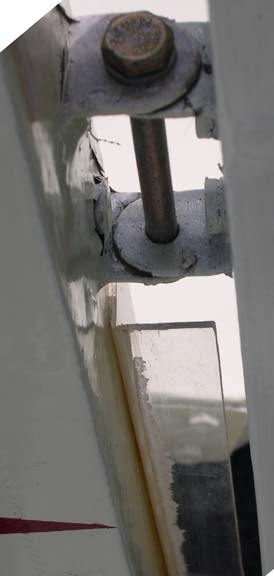
Mike used silicone glue to attach his. I like replacability, so I used #6 stainless steel sheet metal screws. Drill three mounting holes per seal (except for the short ones near the tip), position them in the right spot, and drill the pilot hole in the stabilizer spar.
If the control surfaces are off, remove the seals and reinstall them (you'll find you can't "feed" the hinge pin with the seals in the way). Then install the gap seals. If you've installed them on the horizontal stabilizer, I'd run a thin bead of clear silicone across top of the angle, where it intersects the spar, to prevent water from getting trapped between the pieces.
That's it! I've got several hours on mine, and they seem to work fine.
One warning: They can only be used on the tail surfaces, NOT the
ailerons. See the Advice page for low-cost
aileron seals.
Comments? Contact Ron Wanttaja
.