[RJW Note: Many Fly Babies don't have
generators, but most owners want power for radios,
transponders, etc. Wind generators have been discussed
for quite a while, but there were a lot of perceived
difficulties...documented on a previous
discussion on the topic. However, Ian
Cameron has actually come up with a good, fairly low-cost
solution.]
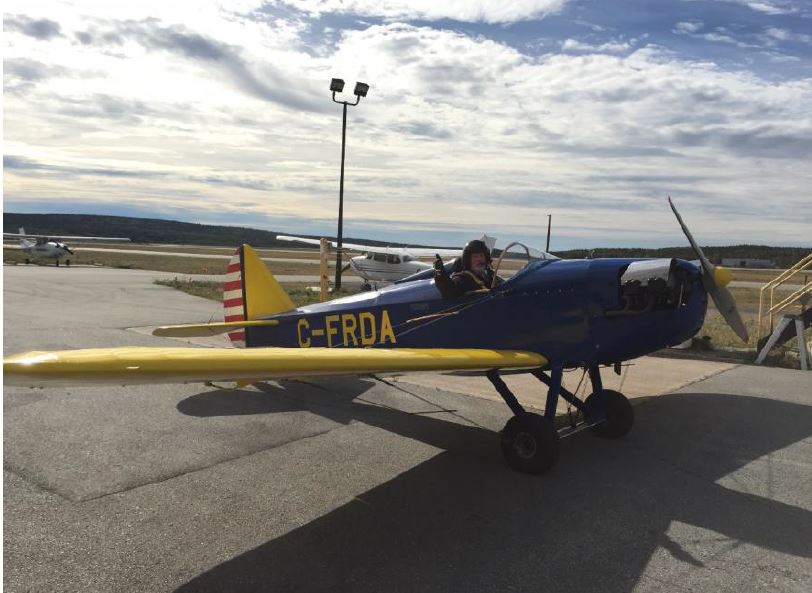
I bought FReiDA with nothing more than a little tray to hold a handheld, and an antenna installation that scared hell out of me (I’m a broadcast engineer by trade); it’s hard to see but there is a standard fiberglass whip hanging between the front gear legs, right between the bracing wires and almost touching the fairing on the axle… I can’t imagine there is any software in the world that could model the pattern that creates… but that’s not today’s story.
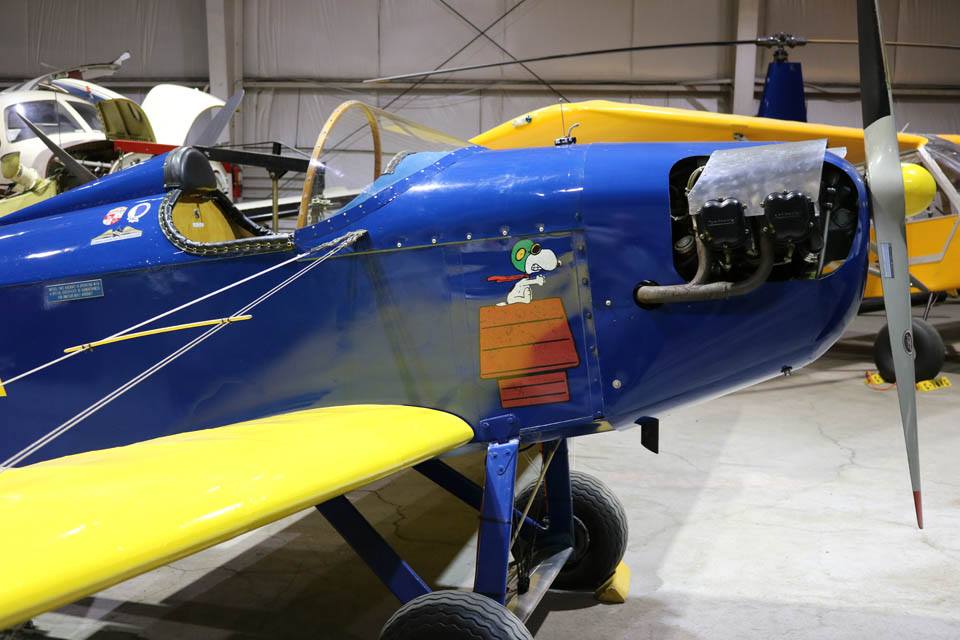
If I wanted to go pretty much anywhere a transponder was needed. There was already a bracket in the luggage space that fit a 12 AH gelled battery perfectly, and with some shims a similar capacity lithium power pack would fit… until I figured out they lied; it was promoted as 12,000 milliamp hour but in actual fact there are three 4000 milliamp hour packs to make up the 12 volts. Still more than sufficient for several hours.
A Sandia STX165 promised low current drain and suitable performance, and I especially liked the built in encoder. The only dilemma was how and where to mount it. Being open cockpit and all, I wanted everything to be easily removable. The apprentice mechanic came up with the solution in one word: Velcro. Initially went with just a diffuser on the static connection but testing proved cockpit pressure was a little low, so plumbing into the static line made it a bit less removable but still possible.
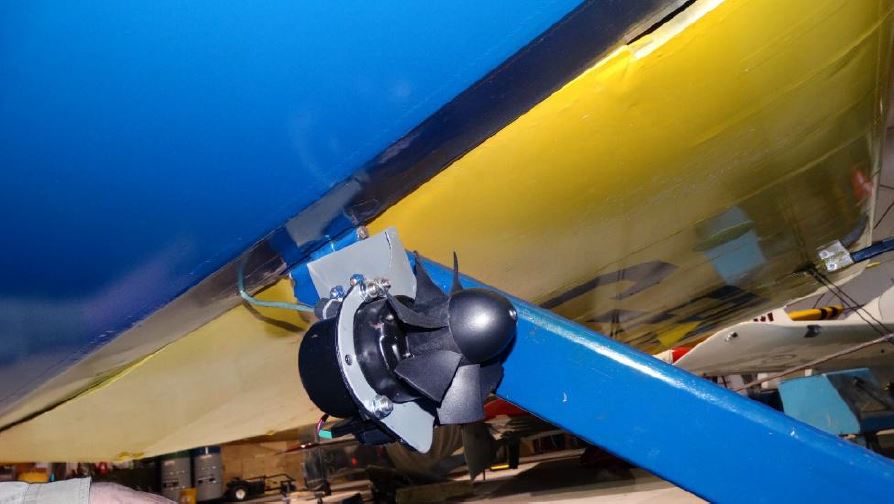
But, any thought of long trips would mean pretty much shutting down for the day after 5 or 6 hours to recharge everything. So, the search began. My engine is an A65-12F so a generator could be mounted, it was mounted when the engine lived on a Jodel, but of course there is no room on a FlyBaby. There didn’t seem to be any reasonable and economical options to mount something on the engine, so a wind generator seemed like the device of choice. Well I almost choked at the price of the BPE14, and thought experiments at building one myself were going nowhere, until I stumbled on the GenniPod… at that price, if it doesn’t work, it won’t hurt too bad.
A lot of pondering on how and where to mount it resulted in using the existing bolts on the rear gear leg fitting; a basic analysis suggests no undue stresses on the bolts or the fitting, and it makes for a short cable run. And back to the gel battery since you can’t charge lithium the easy way.
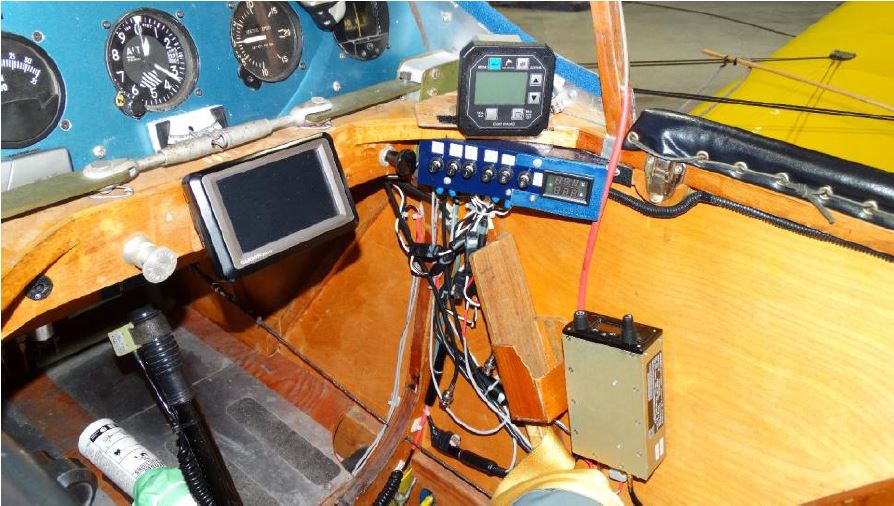
The breaker panel has a $10 Amazon.com volt/amp meter on the right; please excuse the snake pit of wires, still to be properly organized. Also added, 2 NavStobe anti-collision lights, one on an inspection panel on the belly near the tail and one right behind me on the headrest; very low current drain.
That red wire climbing up past the meter? A highly experimental attempt at replacing the original antenna. Ham operators will be familiar with the “bazooka”… trimming things to the appropriate lengths you fold the shield back over the insulation to create a dipole; the red is the heat shrink over the shield and the center conductor is taped to the windshield frame up to the top. Wood and lexan being essentially transparent to RF, makes for an efficient, no drag installation. Worked beautifully with the handheld but with the full power MGL, I don’t want that much RF near my eyeballs… but it stays just in case there are issues with the new fiberglass whip that’s on the belly behind me. As for the transponder antenna, it is pretty much directly below the seat; an aluminum foil pizza pan fits perfectly between the stringers to make the ground plane.
I bought FReiDA with nothing more than a little tray to hold a handheld, and an antenna installation that scared hell out of me (I’m a broadcast engineer by trade); it’s hard to see but there is a standard fiberglass whip hanging between the front gear legs, right between the bracing wires and almost touching the fairing on the axle… I can’t imagine there is any software in the world that could model the pattern that creates… but that’s not today’s story.
If I wanted to go pretty much anywhere a transponder was needed. There was already a bracket in the luggage space that fit a 12 AH gelled battery perfectly, and with some shims a similar capacity lithium power pack would fit… until I figured out they lied; it was promoted as 12,000 milliamp hour but in actual fact there are three 4000 milliamp hour packs to make up the 12 volts. Still more than sufficient for several hours.
A Sandia STX165 promised low current drain and suitable performance, and I especially liked the built in encoder. The only dilemma was how and where to mount it. Being open cockpit and all, I wanted everything to be easily removable. The apprentice mechanic came up with the solution in one word: Velcro. Initially went with just a diffuser on the static connection but testing proved cockpit pressure was a little low, so plumbing into the static line made it a bit less removable but still possible.
But, any thought of long trips would mean pretty much shutting down for the day after 5 or 6 hours to recharge everything. So, the search began. My engine is an A65-12F so a generator could be mounted, it was mounted when the engine lived on a Jodel, but of course there is no room on a FlyBaby. There didn’t seem to be any reasonable and economical options to mount something on the engine, so a wind generator seemed like the device of choice. Well I almost choked at the price of the BPE14, and thought experiments at building one myself were going nowhere, until I stumbled on the GenniPod… at that price, if it doesn’t work, it won’t hurt too bad.
A lot of pondering on how and where to mount it resulted in using the existing bolts on the rear gear leg fitting; a basic analysis suggests no undue stresses on the bolts or the fitting, and it makes for a short cable run. And back to the gel battery since you can’t charge lithium the easy way.
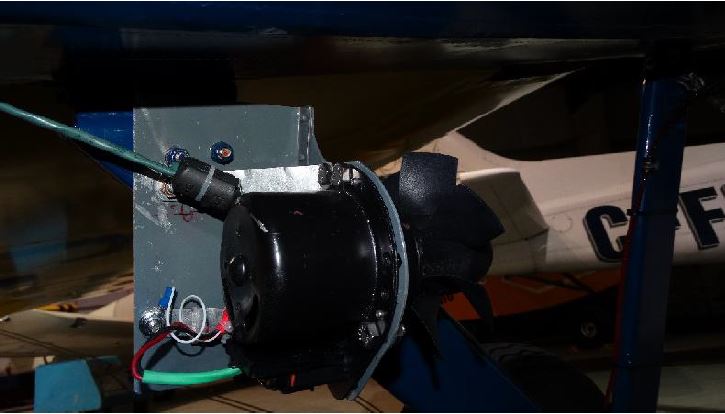
I take no credit for the bracket; it was
built by a guy who is a wizard at all things mechanical (an
RV6A builder and I keep harassing him about putting the
wheel on the wrong end)… his garage is better equipped than
most professional machine shops. He had a neat trick of
marking for the bolt holes… because nobody ever builds
exactly according to plans, right? Swipe some lipstick on
the ends of the bolts then slap a piece of cardboard up
against them. Maybe you already knew that one, but was new
to me… but I play with electrons most of the time.
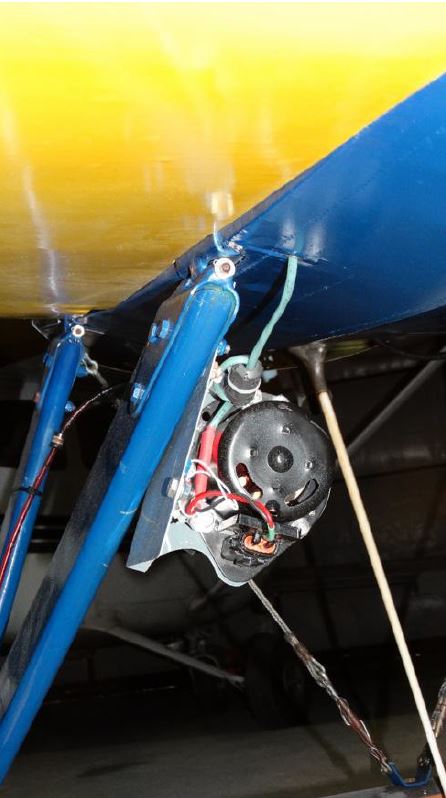
With a Gopro lashed to the opposite gear
leg, flight testing was done, including up to VNE, of
the bracket alone, generator with no impeller, and fully
rigged out, all with no vibration or bending.
Electrical plumbing was all conventional; there was already an automotive inline fuse at the battery but a “master” breaker is also in the panel to use as the ON switch. A simple wooden block to mount the Garmin Aera 510 (another ebay treasure), you can see the transponder towards the lower right with the original box for the handheld to its left, and a MGL V10 sitting up on the little shelf at the windshield corner… again Velcro came to the rescue.
Electrical plumbing was all conventional; there was already an automotive inline fuse at the battery but a “master” breaker is also in the panel to use as the ON switch. A simple wooden block to mount the Garmin Aera 510 (another ebay treasure), you can see the transponder towards the lower right with the original box for the handheld to its left, and a MGL V10 sitting up on the little shelf at the windshield corner… again Velcro came to the rescue.
The breaker panel has a $10 Amazon.com volt/amp meter on the right; please excuse the snake pit of wires, still to be properly organized. Also added, 2 NavStobe anti-collision lights, one on an inspection panel on the belly near the tail and one right behind me on the headrest; very low current drain.
That red wire climbing up past the meter? A highly experimental attempt at replacing the original antenna. Ham operators will be familiar with the “bazooka”… trimming things to the appropriate lengths you fold the shield back over the insulation to create a dipole; the red is the heat shrink over the shield and the center conductor is taped to the windshield frame up to the top. Wood and lexan being essentially transparent to RF, makes for an efficient, no drag installation. Worked beautifully with the handheld but with the full power MGL, I don’t want that much RF near my eyeballs… but it stays just in case there are issues with the new fiberglass whip that’s on the belly behind me. As for the transponder antenna, it is pretty much directly below the seat; an aluminum foil pizza pan fits perfectly between the stringers to make the ground plane.
 Return to the Tech Page